4. Scan documents at printer
Tip: It is advisable to save your email address in the Printer’s Address Book if you are an avid user that needs frequent scanning. Visit here.
Please follow the below steps in order to scan your documents using the business printer:
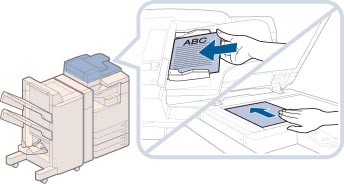
1. Place your originals.
2. Press [Scan and Send].
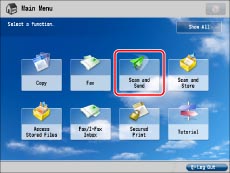
If the desired function is not displayed on the Main Menu screen, press [Show All].
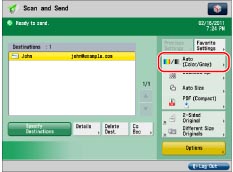
3. Specify the destination.
|
IMPORTANT
|
|
If you set an address type to ‘On’ in [Limit New Destination], you cannot enter new destinations of that type. Select a stored destination by using the Local Address Book.
|
|
NOTE
|
|
You can specify and send to up to 256 destinations at the one time. However, if you specify a group address as a destination, each address stored in that group is counted as one destination.
The icons that are displayed on the screen are:
 : E-Mail : E-Mail |
4. Specify the desired scan settings.
You can press [Options] to select useful scanning modes. You can also use modes in combination.
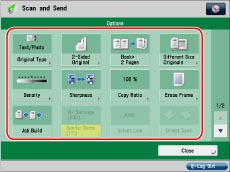
Press  or
or  to display the desired mode.
or to display the desired mode.For more information on setting each mode, see the corresponding section.
5. Press  (Start).
(Start).If the original is placed on the platen glass, follow the instructions that appear on the touch panel display → press(Start).
(Start).When scanning is complete, press [Start Sending].
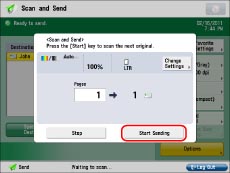
If a message appears indicating that scanning was canceled because the data size for the scanned original exceeds the maximum data size, scan your original again.
6. When scanning is complete, remove your originals.
For More Information:
http://downloads.canon.com/iRADV_Manuals/4000Srs/iRADV4000Srs_eManual/contents/1T0001293740.html