3. Adding email to ‘Address Book’ for Scanning
Firstly, You must add your email address to the printer, in order to scan and send documents to your email address, especially, if it is a routine task for you. Below are the steps:
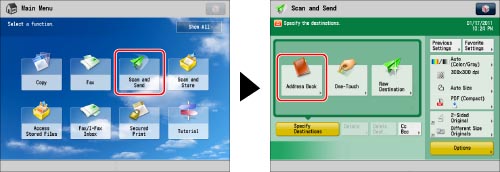
1. Press [Scan and Send] → [Address Book].
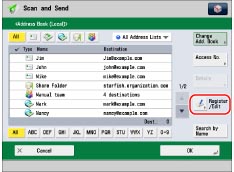
2. Press [Register/Edit].
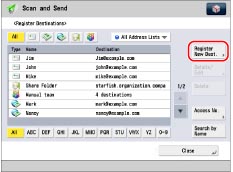
3. Press [Register New Dest.].
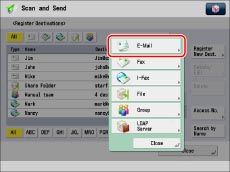
4. Press [E-Mail].
5. Press [Name].
6. Enter a name for the destination → press [OK].
|
NOTE
|
|
The first character that you enter for the name is used for sorting the destination list when you press keys, such as [ABC], [DEF], and [GHI], on the Address Book screen. If [Search by Name] is pressed on the Address Book screen, a screen for narrowing the search in the Address Book appears.
|
7. Press the drop-down list → select an address list from Address List 1 to 10.

Address lists are a convenient way to classify destinations.
8. Press [E-Mail Address].
9. Enter the e-mail address → press [OK].
10. Specify the setting for <Divide Data> as necessary.
For details on Divide Data, see step 4 of “Specifying a Destination by Entering an E-mail Address.”
11. Press [OK].
If you are performing Access Number Management for the Address Book, perform the following operation.
Press [Next] → [Access No.] → [Access No.].
Press [Confirm].
Enter the access number using  –
–  (numeric keys).
– (numeric keys).Enter the access number again for confirmation → press [OK] → [OK].
12. Press [Close] → [OK].