1. Installing the Printer
Please follow the Below Steps to Install the Canon Printer at Nimble Cowork:
- Click on the URL Link –> Cannon ImageRunner Advance 4225. Click on ‘Drivers & Downloads‘.
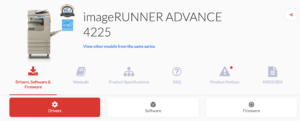
2. The page will automatically detect your Windows Version or Mac version, and will show the respective drivers.
For Microsoft Windows OS:
3. Click on the ‘Select‘ button next to the ‘Generic Plus UFR II Printer Driver‘, and Download the Driver. This will download the driver to your computer hard disk in the Downloads section.
4. Go to Downloads folder in your computer (or wherever you have downloaded the driver), and unzip the files to a desired location. This will extract the zipped files to a new folder.
5. Go to the new folder where you have extracted the files. You will find a setup.exe file. Double click on the same, and follow the installation instructions.
6. The set-up wizard will automatically search for the nearest available printer. Simply follow the instructions on the screen, and the printer will be installed momentarily.
7. Select Printer with the following IP address:
- ‘10.5.50.3‘ for III floor, or
- ‘10.5.50.15‘ for IV floor, or
- ‘10.5.50.101’ for II Floor
- ‘10.5.52.161’ for I Floor
8. Before printing make sure that you have selected the paper source option as ‘A4’ size paper, and not ‘Letter’ size.
For detailed instructions, please see a video on how to install a printer on Windows here: https://www.youtube.com/watch?v=B2Z_b41gUoU
For Apple or Mac OS:
3. In Continuation from Point 2 above, we shall first install the latest Canon Printer Driver from the URL Cannon ImageRunner Advance 4225 on your MacOS. Click on the ‘Select‘ button next to the ‘UFR II/UFR II LT Printer Driver & Utilities for Macintosh‘, and Download the Driver. This will download the driver to your computer hard disk in the Downloads section. Install the dmg installable file.
4. From the Apple menu, select . In System Preferences, from the menu, select , , or .
5. Click the (plus sign) to add a new printer, and in the new window that opens, click
a. In the “Address:” field, type the following IP address:
- ‘10.5.50.3‘ for III floor, or
- ‘10.5.50.15‘ for IV floor, or
- ‘10.5.50.101’ for IInd Floor
- ‘10.5.52.161’ for I Floor
b. In the “Protocol:”, select ‘Line Printer Daemon – LDP’
c. Name: Give the printer a descriptive name and location in the appropriate fields, such as Nimble 3 Floor or Nimble 4 Floor. This is only for your convenience.
d. From the drop-down list beside “Use:” or “Print Using:”, choose ‘
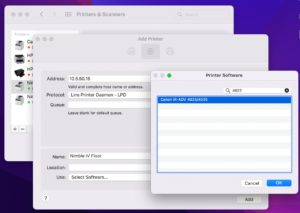
6. Click . Your computer will install your printer’s software.
7. When your printer is installed, it should appear in the “Printers & Scanners”, “Print & Scan”, or “Print & Fax” window. To select a default printer if you have more than one installed, choose a printer from the list in the menu next to “Default Printer:”
![]()
![]()